
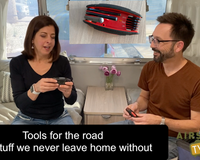
You’ve got a new (or new to you) Airstream—what tools should be first on your list?
I'm going to assume you already have a sewer hose, a hitch, and other obvious things. Let's talk about the things that you'll learn you need through experience—without having the painful experiences.
Before I launch into my choices, a few disclaimers:
- This is by no means a comprehensive list. There's probably a hundred more things that I could add. But these are some of the most useful tools and essential upgrades, in my experience.
- Not everything on this list is for everyone. Much depends on individual style: minimalist vs. survivalist, glamper or camper, hard-core DIY'er or "I always go to the dealer". Think about how you travel, where you travel, and what sort of Airstream you have before you rush out to get new gear.
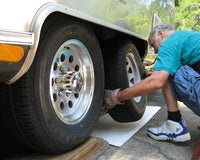
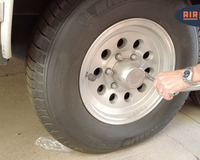
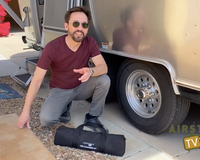
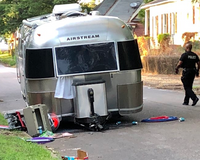
1. A tire changing kit
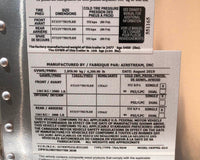
Your Airstream trailer did not come with a full set of tools needed to change a tire. You get a spare tire and a basic lug wrench – even though the Owner's Manual calls for a torque wrench.
If you're thinking that the tools that came with your truck will help, think again. The lug nut wrench probably won't fit and the other tools won't be much help when you need to change a tire on your Airstream. You need a dedicated Airstream trailer tire changing kit.

Everybody should know how to change their own tires and carry the tools, even if you don't actually plan to do it yourself. You may be physically unable to, but if you have the knowledge and you have the tools with you, then at least somebody else can change the tire.
The alternative is calling for roadside assistance, which might seem to be a great solution, but usually you’ll be sitting by the side of the road for hours, often in a place you do not want to be. Waiting to have someone come to change a tire for you is like waiting for somebody to come dress you in the morning. If you can do it yourself it is so much faster!
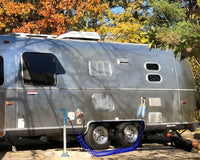
It's not hard to change a tire. You can see the process in the video below, or read about it my book "The (Nearly) Complete Guide to Airstream Maintenance, 2nd edition"—and we also include instructions in the Tire Changing Kit.
We offer a Tire Changing Kit because it's convenient to have one kit with all the tools in a single carry bag, but if you want to put together your own kit I'll be just as happy.
The basics are a torque wrench (essential for correctly tightening the lug nuts when you put the wheel back on); a breaker bar (used for removing the wheel); an extension, and a correctly-sized socket. We also include a safety vest for roadside visibility, an air gauge to check the air pressure, a six page instruction manual that explains exactly how to change a tire, and a padded bag to keep everything together.
Tip: If you choose to buy all the parts separately, make sure you don't skimp on the torque wrench. Cheap torque wrenches are not worth the money.
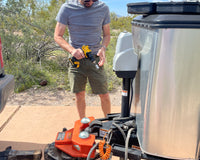
2. A cordless drill
It's amazing how often I use my cordless drill for things other than drilling holes. On a trailer without powered stabilizer jacks, you can use a cordless drill with a socket adapter like this one, so you don't have to kneel on your hands and knees in the mud to put your stabilizers up and down.
If you have a Hensley Arrow hitch, an 18 volt cordless drill makes quick work of tightening the strut jacks, and it's also essential for the Hensley Hitch Helper (aka BAL Tongue Twister) if you have one of those.
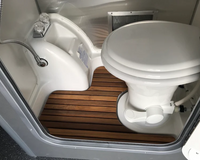
I also find myself using the cordless drill to fix things around the Airstream. For example, on a recent trip the bathroom door's hinge started to pull out of the door frame. With my cordless drill I was able to quickly drill a hole and install an additional screw to secure the hinge again—problem permanently solved in just a few minutes. Without it our trip would have been marred by a bathroom door that wouldn't close until we got home.
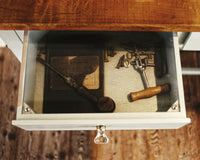
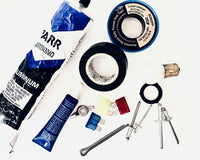
3. A tool bag, with a few choice tools
I'm a big believer that it always pays to have dedicated tools for the Airstream. Not only does it save time, it ensures you always have the right tools in the Airstream on every trip. Don't borrow tools from the garage for each trip, because you might forget them.
So start with a little tool box or (my preference) a tool bag. Make sure it will fit easily into the exterior storage compartments. Outfit it with the little tools you need most often during a trip, and the little parts that often need replacing.
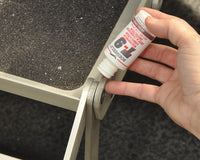
Start with a few Philips screwdrivers. You can practically disassemble the complete interior of an Airstream with a single Philips screwdriver. You'll find yourself tightening screws from time to time—they do occasionally work loose during trips. Some blue Loc-Tite will help keep screws from coming loose again or, to fix holes that have gotten too big to hold a screw you can carry a few match sticks and white glue.
Consider adding some of the following: adjustable wrench, pliers, a small "tackle box" for small parts like screws, spare fuses & fuse puller tool, teflon plumbing tape, silicone spray or Boeshield T-9, a few spare aluminum pop rivets in the correct sizes, a good quality rivet tool, sets of screw bits and drill bits for the cordless drill, utility scissors, and a small microfiber towel or rag. Many of these items are in our Maintenance Essentials Kit.
I also like to have a headlamp so I can fix or examine things at night without having to hold a flashlight. A pair of disposable latex gloves can be nice for dirty jobs.
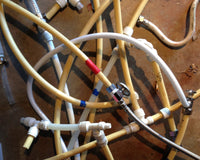
If you might get into little fixes or modifications to the 12 volt wiring system, then I'd add: electrical tape, butt splices, crimping tool, wire stripping tool, and a voltmeter.
If you have a Hensley hitch, I'd recommend a set of Allen wrenches and a grease gun (but you'll want to keep that in the bumper compartment because it's big and greasy).
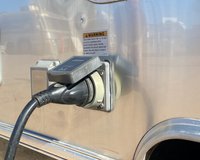
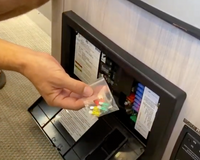
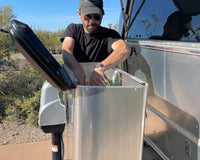
4. An Electrical Management System (EMS)
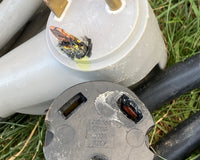
Any campground can have problems with power. Damaged outlets, loose connections, incorrect wiring and low voltage are common. The best way to protect the electronics in your Airstream is not with a surge protector, but with a full Electrical Management System (EMS) that guards against:
- voltage too high or too low
- mis-wiring or poor wiring connections
- reversed polarity
- electrical surges

Low voltage is by far the most common problem. An RV air conditioner typically can accept as little as 105 volts, but when you fire it up the compressor in it draws more power momentarily. So even though your voltage meter might shows 108 or 110 volts, you should keep an eye on it as the air conditioner starts up. If the voltage suddenly drops down below 105 for more than a few seconds, it is likely to burn out the motor in your air conditioner and you’ll be facing a big bill to replace the entire unit.
By the way, this can be a risk even if you're in a fancy campground with shiny new wiring—especially on hot humid days when everybody's pushing their AC to the max. Low voltage can still be a problem.
An EMS (pictured) checks and monitors the power like a voltmeter, but because it's a "smart" device, it will also take action when something is wrong. If your EMS detects a problem, it will instantly cut the power to save your Airstream or appliances from damage—and it will automatically re-connect when it's safe.
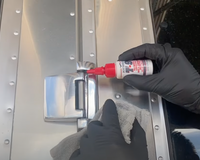
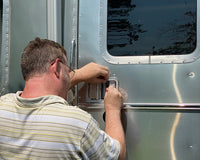
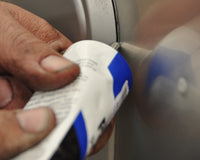
5. A rivet tool
A rivet tool is a surprisingly easy thing to learn how to use. Basically you just stick a rivet in the hole, hold it tight against the surface, pop the handle of the tool a few times, and the stem of the rivet breaks off when you're done. It's as easy as a screwdriver.
Don't believe me? Check out this short video where Tothie demonstrates it.
Do you really need to travel with a rivet tool? Yes!
Those little rivets on the inside of your Airstream break occasionally, especially after traveling a rough road, and there's no need to haul your Airstream to a dealership just for that simple little repair. Just break out your handy tool and spare rivets, and you can fix the problem in seconds.
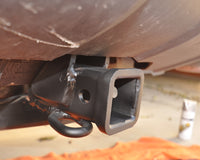
Also, someday you'll lose a belly pan rivet, which is a more pressing problem. It happens because corrosion occurs where the aluminum belly pan and steel frame meet. The result can be a belly pan dragging on the road. If you have a rivet tool, a cordless drill, and the right sized aluminum pop rivets you can be back on the road in minutes.
It's a no-brainer. There are 4,000-5,000 rivets in the average Airstream. You should be able to replace one of them.
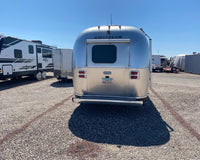
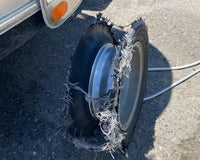
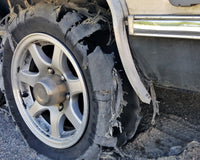
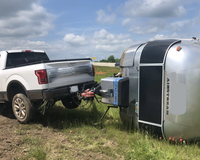
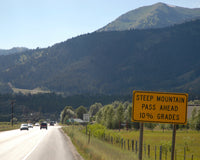
6. Tire pressure monitor
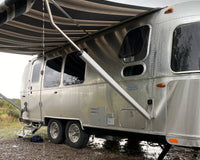
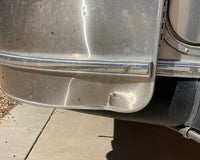
 A flat tire can do lot more damage to your trailer than you might think. It doesn't just go flub-flub-flub as you come to a stop. Often you'll have no idea that you've had a flat because it's way back there on the trailer as it starts to shred. It rips up your Airstream, destroys the wheel, creates a hazard on the road, and it leaves you with a thousand dollars of damage that could have been prevented.
The TST tire pressure monitoring system is not cheap, but it’s the best. I use it on every tow and it has saved my Airstream more than once.
7. A good quality water hose
You can get drinking water hoses everywhere, and they're usually pretty cheap—about $30.
But the ones the RV industry pushes are really pretty bad. They kink, they have thin fittings that bend and leak after a year or so, and they fail regularly. Don't even think of letting it freeze or get run over by a truck while it's pressurized; the hose will burst. For these reasons, many people end up buying a new hose every year or so, which is not a good deal in the long run.
I could go on all day about how lame the typical "white hose" is, but instead I'll just say this – get an Ultimate RV Water Hose:
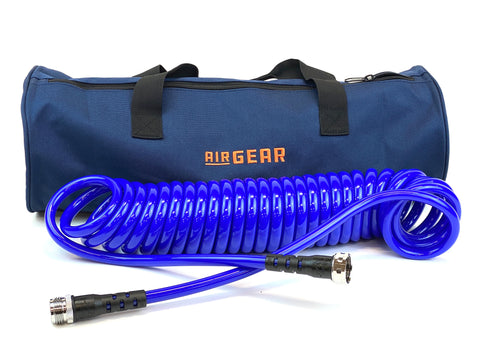
After years of replacing cheesy Wal-Mart and Camping World hoses, I finally decided to develop a far better one. We guarantee it for 5 years against any type of failure no matter what you do to it (other than cutting it with a knife).
Yes, it costs double what a cheap hose costs. But you won't need to replace it for a very long time. Mine has been in heavy use since 2017 and I expect to keep using it for many years. If you want to read more about why you should ditch the ordinary water hose, read this blog entry.


2 comments
Manuel
Neat trick raising one of the wheel to change the tire on the other one, on a dual axle trailer. What about a single axle Airstream? Do you then need a hydraulic jack to raise the axle, and if so, what are the constraints for example can you still be hitched to the tow vehicle?
Rich Luhr
Manuel, owners of single axle Airstreams will need to use a hydraulic bottle jack. The exact position for the jack is described in your owner’s manual.
Yes, you can remain hitched to the tow vehicle when changing a tire, and in fact it’s an additional safety measure to ensure the trailer doesn’t roll during the operation.