
We recently met up with friends at Organ Pipe Cactus National Monument and while relaxing on the patio one evening, Rich recounted one of his most memorable newbie experiences at a campground dump station.
It was in his very early days of Airstreaming, at the end of the annual Airstream Club International Rally. Everyone was lined up to dump their tanks prior to departing for home. When it was Rich's turn, he pulled in with confidence, not knowing what lay in store for him.
What he didn't fully realize until later was that the hose provided at the dump station was a slightly different size than his Airstream's dump valve. To make a long and rather disgusting story short, this resulted in Rich getting shot in the chest with four days of black tank nastiness – causing him to strip down down to his skivvies while his family fetched him a clean set of clothes.
And remember, this was in full view of everyone in the dump line. Dozens of trailers at least.
Lesson learned that day: Never use someone else's sewer hose!
While not all dump station malfunctions end this dramatically, there are still plenty of unpleasant experiences that can be had. Especially when you're new at it, dumping can be stressful.
Here's our simple dump process, along with etiquette tips for getting the job done.
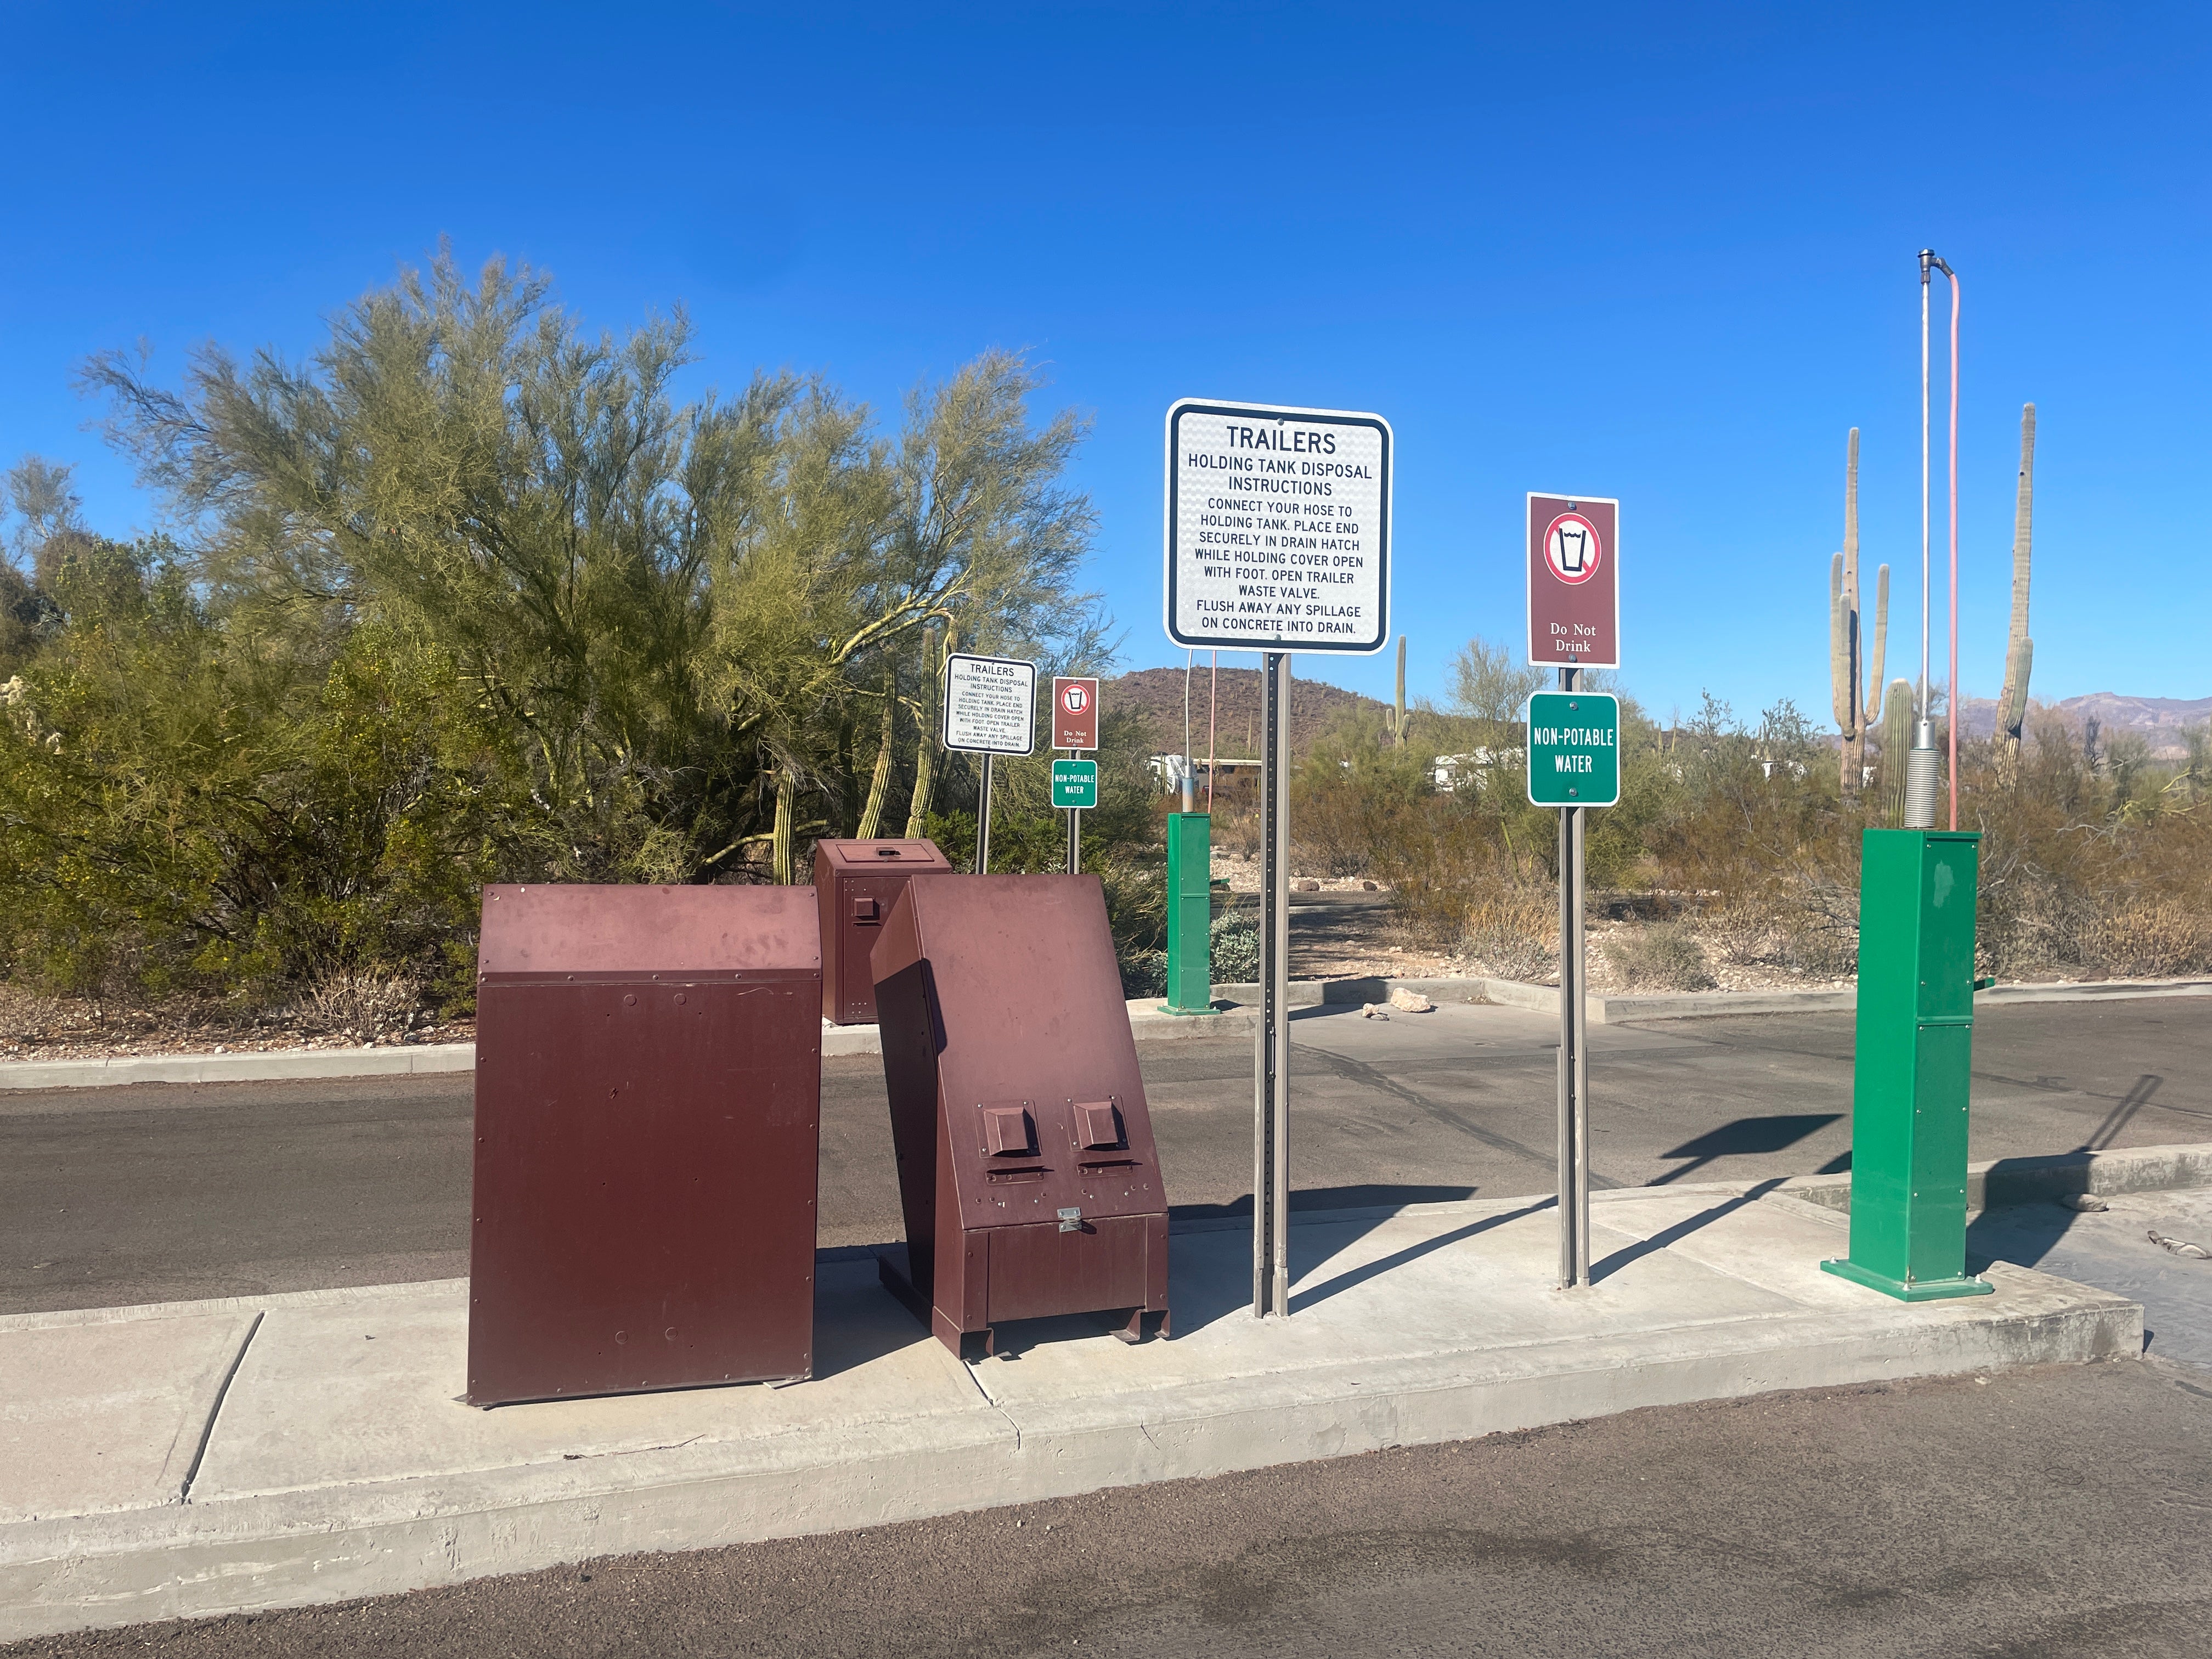
1. Pull up prepared
This is especially true if there is a line. When you pull up next to the sewer dump, make sure the hose is easy to access and gloves (if you use them) are ready to go.

Do you have to wear disposable gloves? No, there's no requirement that says you have to wear gloves when handling the sewer hose. We don't. But many people do. Regardless which option you choose, always wash your hands after touching the sewer hose. This is an important step for cleaning bacteria from your hands.
2. Keep pets and kids in the car
The last thing you need is either running around the dump station and tracking bacteria from their paws or shoes into the car or Airstream. Ew.
3. Take out, and hook up, the sewer hose
Always hook up the sewer hose to the RV first, before securing it to the sewer drain. Make sure the hose is tightly secured to the trailer hose valve so it doesn't come loose during your dump.
Next, secure the hose to the sewer drain. Some dump stations have a way for you to screw in the hose elbow, others don't.
Tip: Use a heavy rock to keep the sewer hose secure, if needed.

4. Inspect before you pull
Once you've got the hose hooked up, it's smart to give the sewer hose a quick once over. Here's what you're looking for, and what to do:
- If you see a tiny pinhole leak, buy a new hose asap!
- If you had to stretch the hose to reach the sewer drain on this trip, replace the hose soon
- If you feel the hose coming loose at the connection – even the tiniest bit – buy a new hose asap!
5. Dump the tanks
The black tank is always first, because the contents that go through are, shall we say, chunkier. The gray tank contents are mostly water, so they flush out more readily and whoosh out most of the remaining chunks. The gray tank's soapy water also helps rinse out the sewer hose.
So, first pull the black tank lever until everything has emptied out. Then pull the gray tank lever until its contents have emptied out. Basecamps have a combined black and gray tank, so there’s only one handle for both.
NOTE: Most Airstreams and other brand RVs come with a black tank flush system for rinsing out the black tank after you've dumped it. We don't routinely perform a black tank flush, so consult your Owner's Guide for details about this procedure.
Etiquette: Do not perform a black tank flush if there is a line at the dump station. Dump and go.
Etiquette: Minimize chit-chat with other campers during the dumping process. It can hold up the line, annoying those waiting.
You might be wondering why our sewer hose does not have the plastic window in the elbow, which is a common sight these days. It's because we find it easy to hear the dumping process end. We don't need to see it to believe it.
 6. Drain the hose
Unhook the sewer hose from your RV and carefully lift it up so everything drains down the sewer. When you're sure everything has drained out, unhook the other side of the sewer hose as well.
Tip: Pay attention so you don't get anything on your shoes!

Etiquette: If you've made a mess in around the sewer drain, clean it up. Don't leave your business behind for someone else to deal with. Use the dump station water hose to hose everything down the drain. That is usually sufficient.
Etiquette: Never pour straight bleach over the dump station to clean it. We watched in horror as a couple ahead of us poured a half bottle of full strength bleach all over the dump station after they made a mess. This will kill the good bacteria in the septic system (nearly all campground dumps are on septic system), not to mention the smell and danger of bleach will linger for the following dump users.
7. Wash your hands with soap and water
Whether you donned disposable gloves for the dumping process or not, you need to watch your hands.
Gloves can have pinholes, and you may still touch the hose after you take them off. Always wash your hands thoroughly with soap and water after putting away the sewer hose.
8. Add tank chemicals
Tank chemicals (often called “sanitizers”) help break down and liquify the waste, which is what you want for trouble-free tank dumping. They also help eliminate smells.
Add tank chemicals every time you dump the black tank. The procedure is simple: turn on the water pump, fill the toilet bowl about halfway, and pour the recommended amount of tank chemicals into the water (measurements are on the tank chemical package). Then flush it all own and hold the pedal for a few seconds to add more water.

Tip: There are many brands of tank chemicals. We typically buy whatever is available at Walmart or an RV store. But our experience is that the liquid tank chemicals do a much better job of keeping the smell away than the pods.
Here's the most recent brand we purchased:

9. Fill the fresh water tank
Unless there is a line, we rarely leave the dump station without filling up the fresh water tank. And typically we filter the water using the Blu Technology Water Filtration system as we fill up the tank.
Tip: Read signs carefully. In this campground, the freshwater station was first in the dump station line, and the sewer drain station followed. Make sure you read the signs and look for Potable Water. You don't want to confuse the drinking water hose with the dump station rinsing hose.
Etiquette: If there's a line at the dump station, don't fill the fresh water tank. It takes too long and holds up the line.

A final reminder
Sewer hoses don’t last forever. To avoid disasters of the worst possible sort, replace your sewer hose at the very first sign of cracking, pinholes, or any sort of wear. Don't try to save a few dollars by using a marginal sewer hose "just one more time."
People who wait for the hose to fail usually regret their choice. After a few years watching fellow RVers at the dump station, you will undoubtedly see a dramatic example of this. Chuck that questionable sewer hose and economize on something else.
7 comments
Peggy
We also let a little grey out to test the connections – at both ends. The reason we use a clear elbow is not just to know when it’s done flowing, but to see if what’s flowing is – well – chunkless. When we are able, we flush a time or two until no more chunks show up.
Anonymous
Gil and Raymond – We just look at the hose connection to make sure it’s secured properly before we pull the valve. But if the testing technique you mention gives you confidence, have at it. :-)
Anonymous
Gil – Some tank treatments include chemicals to “lubricate” the valves. There’s also a product on the market specifically for lubricating dump valves. It’s an open question as to whether these are really needed, but here is a link to a product that does this (although we do not use or have a specific recommendation about it): https://thetford.com/us/thetford-support/drain-valve-lubricant/
Anonymous
Dane – Your quick thinking avoided a huge disaster! Thank goodness they asked for your help so you were there to assist.
Dane T. Hyde
I was next in line at busy dump station and the camper at the station was preparing to dump. The lady came back to me and said "we are new at this, can you keep an eye on him, he will probably mess up! " Then SHE marched back and pulled the black tank valve with nothing hooked up yet!!! I yelled NOOOO STOP! Fortunately, the cover was still in place. Now I’m in disaster prevention mode. Closed the valve, got a pan for under the valve, took off the cover and dumped it. Hosed down the area and started over.
Gil Jarvie
Always good information and much appreciated. I will often check my connections by draining just a wee bit of the grey tank first. If not leaks, then grab the black handle. QUESTION: are tank treatments sufficient to lubricate the rubber stop valves? I can lubricate the exposed pull rods but not sure how to treat the rubber gaskets inside.
Thanks!
Raymond Russell
One tip that I have heard (not tried yet because I forget to) it to open the gray tank first, just for a few seconds, to make sure all of your connections are tight and there are no leaks. Then close the gray tank and dump the black tank.